
Temenos Lifecycle Management Suite - Collection Product Guide
Collections and Recovery Queues
| Administrator Guide > Desktop and Ribbon Bar > Collection and Recovery Queues > Collections and Recovery Queues |
Collection Queues allow financial institutions to organize, manage, and prioritize work based on different account and/or person attributes. They are created in System Management > Collections > Collection Queues.
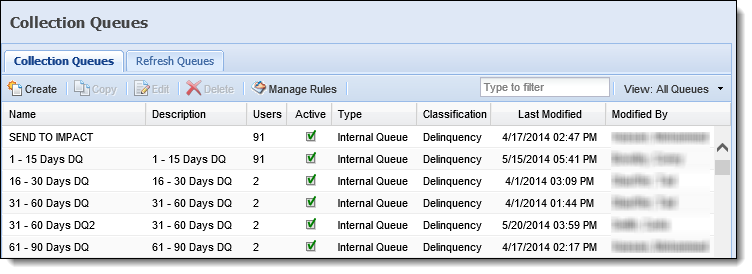
The Collection Queues page contains two tabs: Collection Queues and Refresh Queues.
From the Collection Queues tab, administrators can create queues, copy existing queues, edit existing queues, delete queues, and manage rules, if the rules functionality is enabled for the institution.
 |
The Manage Rules button is not available if advanced queuing is not active in the Lifecycle Management Suite. See Advanced Queuing for more information. |
The grid displayed on the Collection Queue tab contains the following columns:
| Column Name | Description |
| Name | Name of the Collection Queue. |
| Description | Description of the Collection Queue. |
| Users | Number of users assigned to the Collection Queue. |
| Active | If checked, the Collection Queue is active in the Lifecycle Management Suite. |
| Type | Displays whether the Collection Queue is Internal, Dialer, or Third Party. |
| Classification | Displays whether the Collection Queue is Delinquency or Recovery. |
| Last Modified | Denotes when the last modification was made on the Collection Queue. |
| Modified By | Denotes who made the last modification on the Collection Queue. |
All Collection Queues include the following attributes, which are defined when creating, copying, or editing a Collection Queue:
The General attributes allow administrators to activate the queue, as well as define the basic settings for the queue, such as name, type, and Get Next Options.
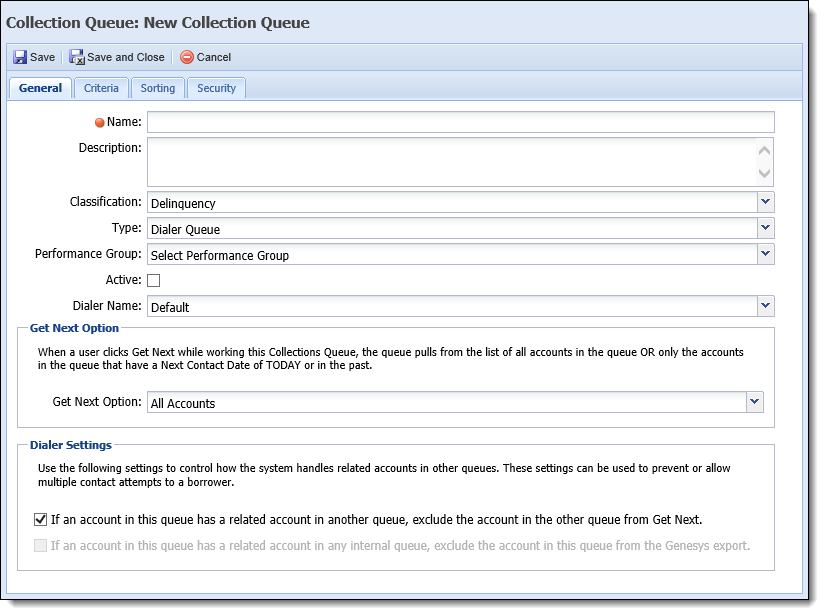
The following attributes are defined within the General tab:
| Field | Description | ||||||||||||
| Name | Enter a name for the queue. This is a required field. | ||||||||||||
| Description | If necessary, provide a description. This gives other administrators more information about the queue. | ||||||||||||
| Classification |
Select Delinquency or Recovery from the drop-down. If using the Recovery module, recovery queues house charged-off accounts separate from delinquent accounts.
|
||||||||||||
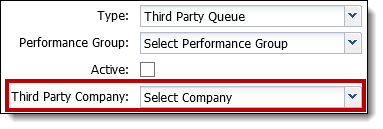
| Type |
Select Dialer Queue, Internal Queue or Third Party Queue from the drop-down. This controls other settings that may appear and may need to be specified on the General tab for the specific queue type. Reference the following table for an overview of each queue type:
|
||||||||||||
| Performance Group | If a specific Performance Group is working this queue, select the group from the drop-down. Performance Groups are configured in System Management > Groups > Performance Groups and allow administrators to evaluate groups of users with similar capabilities. Data regarding calls, contacts, and promises are calculated and tracked for the performance group. | ||||||||||||
| Active checkbox | Click the Active checkbox to make the queue active. To deactivate a queue, clear the checkbox. If a queue is deactivated, a queue refresh must be run to reassign accounts that are still in the queue. | ||||||||||||
| Third Party Company |
This drop-down list only appears when Third Party Queue is selected as the queue type. Select a third party company to associate with the queue being created.
|
||||||||||||
| Dialer Name |
This drop down only appears when Dialer Queue is selected from the Type drop-down. Select the name of the Dialer that is configured in the Lifecycle Management Suite.
|
||||||||||||
| Get Next Option | Select All Accounts or Only Next Contact Accounts from the drop-down. This controls the behavior of the Get Next button in the workspace for users working the queue. "All Accounts" pulls from the list of all accounts in the queue when Get Next is clicked. "Only Next Contact Accounts" pulls from a list of accounts that have a next contact date and time greater than or equal to the current date and time when Get Next is clicked. | ||||||||||||
| Dialer Settings |
This section only appears when Dialer Queue is selected from the Type drop-down. It also appears when Genesys is selected from the Dialer Name drop-down. These settings control how the Lifecycle Management Suite handles related accounts in other queues, thus preventing or allowing multiple contact attempts to the borrower.
The Dialer settings are as follows:
|
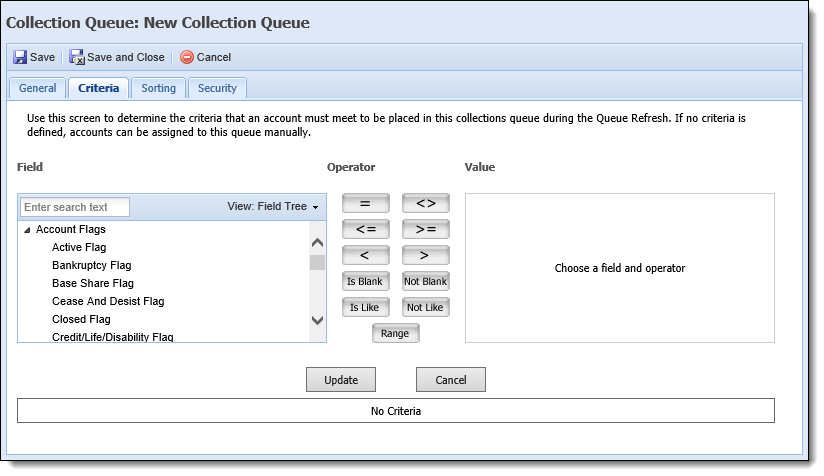
Within the Criteria tab, use the Criteria Builder to determine the criteria accounts need to meet in order to fall into the queue.
|
Refer to the Criteria Builder topic in this guide for more information. |
|
This tab is not visible if Advanced Queuing is turned on. The criteria builder is account-specific and only used for Basic Queuing. Administrators should use business rules to define queues based on account holder and/or account attributes. For more information on determining queue criteria through rules for Advanced Queuing, see the Advanced Queuing section within this topic. |
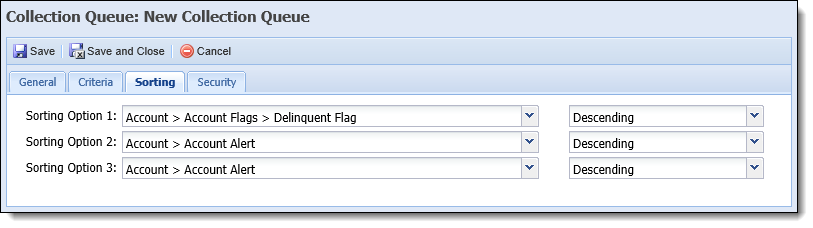
On the Sorting tab, determine the priority order of how accounts get presented to an end-user when they are working a queue. If more than one account has the same value for the field defined in Sorting Option 1, the field defined in Sorting Option 2 is evaluated for prioritization.
For example, a collection queue's sorting option 1 is set to use Days DQ in descending order and sorting option 2 field is set to Delinquent Amount in descending order. During queue assignment, hundreds of accounts are assigned with a Days DQ value of 60. Since the Days DQ value is the same for all of these accounts, sorting option 2: Delinquent Amount is used to determine the priority order. When the end-user clicks the Get Next button, an account 60 days delinquent with the greatest delinquent amount is opened and worked.
|
The order in which accounts are presented is first determined by the Get Next option selected within the General tab, regardless of the sorting criteria defined here. When All Accounts is selected as the Get Next option, accounts with a Next Contact Time active in the database are presented to be worked first regardless of the sorting criteria. After all of the accounts with a set next contact time have been presented, the defined sorting options take place.
When Only Next Contact Accounts is selected as the Get Next option, accounts with a future contact date or time are not presented to the user even if they fall under the sorting criteria. Only accounts with a contact date or time in the past and present are presented to be worked in the queue regardless of the sorting option(s) selected. |
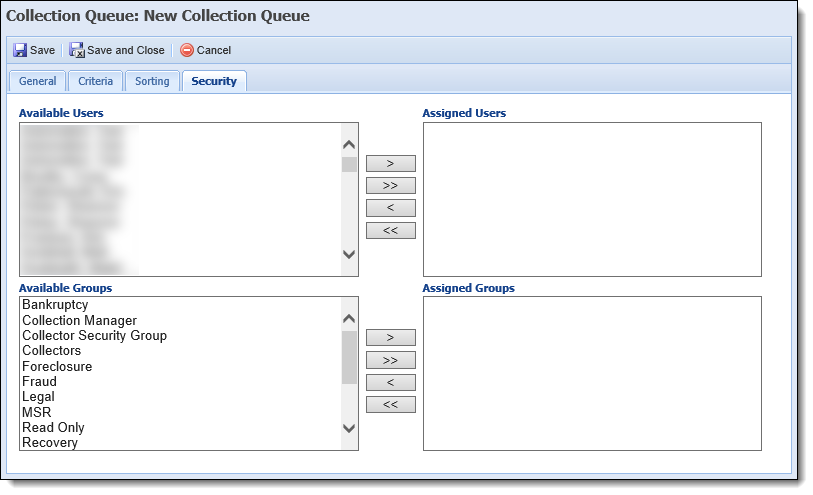
On the Security tab, determine which Users and/or Groups have access to the new queue.
|
In addition to being assigned to the queue within this tab, the user or security group must also be granted View or Change access to the Workspace permission in order for workspaces to be opened from the queue in the Ribbon Bar. This permission is set under the Collection category of the Permissions tab in System Management > Users or System Management > Groups > Security Groups. For more information, please see the Users or Security Groups topic in this guide. |
Administrators are able to perform the following actions within the Collection Queues tab:
To create a Collection Queue:
 above the grid area.
 to add the new queue to the Lifecycle Management Suite.
 |
If authoring Business Rules, it is recommended to click Sync.Lookups within the Application Toolbar in Rules Manager before authoring a new rule in order to ensure the newly created Collection Queue is available within the Rules Management Application. |
To copy a Collection Queue:
 . The Copy Collections Queue screen appears. to add the new queue to the Lifecycle Management Suite.
To edit a queue:
 . to retain the queue settings.
 |
Queues that have accounts assigned to them, or are assigned an an Assignment or Distribution workflow step cannot be deleted. |
To delete a queue:
 .
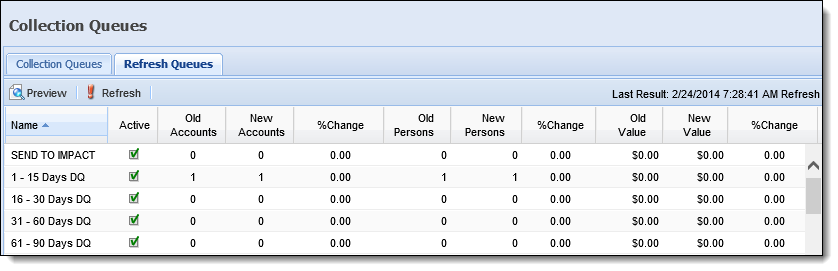
.The Refresh Queues tab allows administrators to manually refresh all collection queues within the Lifecycle Management Suite. Although Collections queues are automatically refreshed on a daily basis following the nightly batch import, administrators can also initiate a queue refresh at any time in order to instantly adapt to any necessary change in focus.
|
If a queue is dependant on a process or if a Profile Import is being used as the primary source of data for accounts, the Queue Refresh process should be dependent on whether the process completes. |
The following columns display in the grid:
| Column Name | Description |
| Name | Name of the Collections Queue. |
| Active | Denotes whether the queue is active in the Lifecycle Management Suite. |
| Old Accounts | Displays the number of accounts in the queue prior to the last refresh. |
| New Accounts | Displays the number of accounts in the queue after the last refresh. |
| %Change | The Percent Change between old and new accounts. |
| Old Persons | Displays the number of persons in the queue prior to the last refresh. |
| New Persons | Displays the number of persons in the queue after the last refresh. |
| %Change | The percent change between old and new persons. |
| Old Value | Displays the old value in $ in the queue prior to the last refresh. |
| New Value | Displays the new value in $ in the queue after the last refresh. |
| %Change | The percent change between old and new values. |
Administrators are able to perform the following actions within the Refresh Queues tab:
 above the grid area.
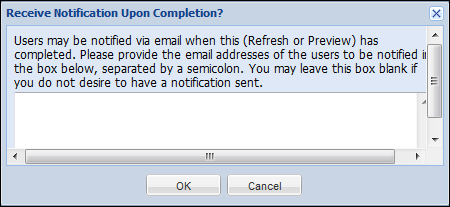
The Receive Notification Upon Completion window appears. This screen allows administrators to enter email addresses, separated by semi-colons, to receive a notification when the preview process is complete. Enter in desired email address or leave it blank, and click OK.
A notification appears showing the refresh preview has started. When the process completes, the grid refreshes showing the new information.
To actually run the refresh, click  above the grid on the Refresh Queues tab.
The Receive Notification Upon Completion window appears. This screen allows administrators to enter email addresses, separated by semi-colons, to receive a notification when the refresh process is complete. Click OK. Enter in desired email address or leave it blank, and click OK.
A notification appears showing that the queue refresh has started. When the refresh is complete, the grid refreshes showing the new information. The timestamp of the last refresh displays above the grid area.

 Create a Queue